blog-post // Jul 7, 2026
Boardslide Basics: Your Entry Point Into Skate Spots and Rails
The boardslide runs 2-6 weeks in Onbolts' learning data and only needs the ollie first. Here's why it's most riders' first real rail or ledge trick.
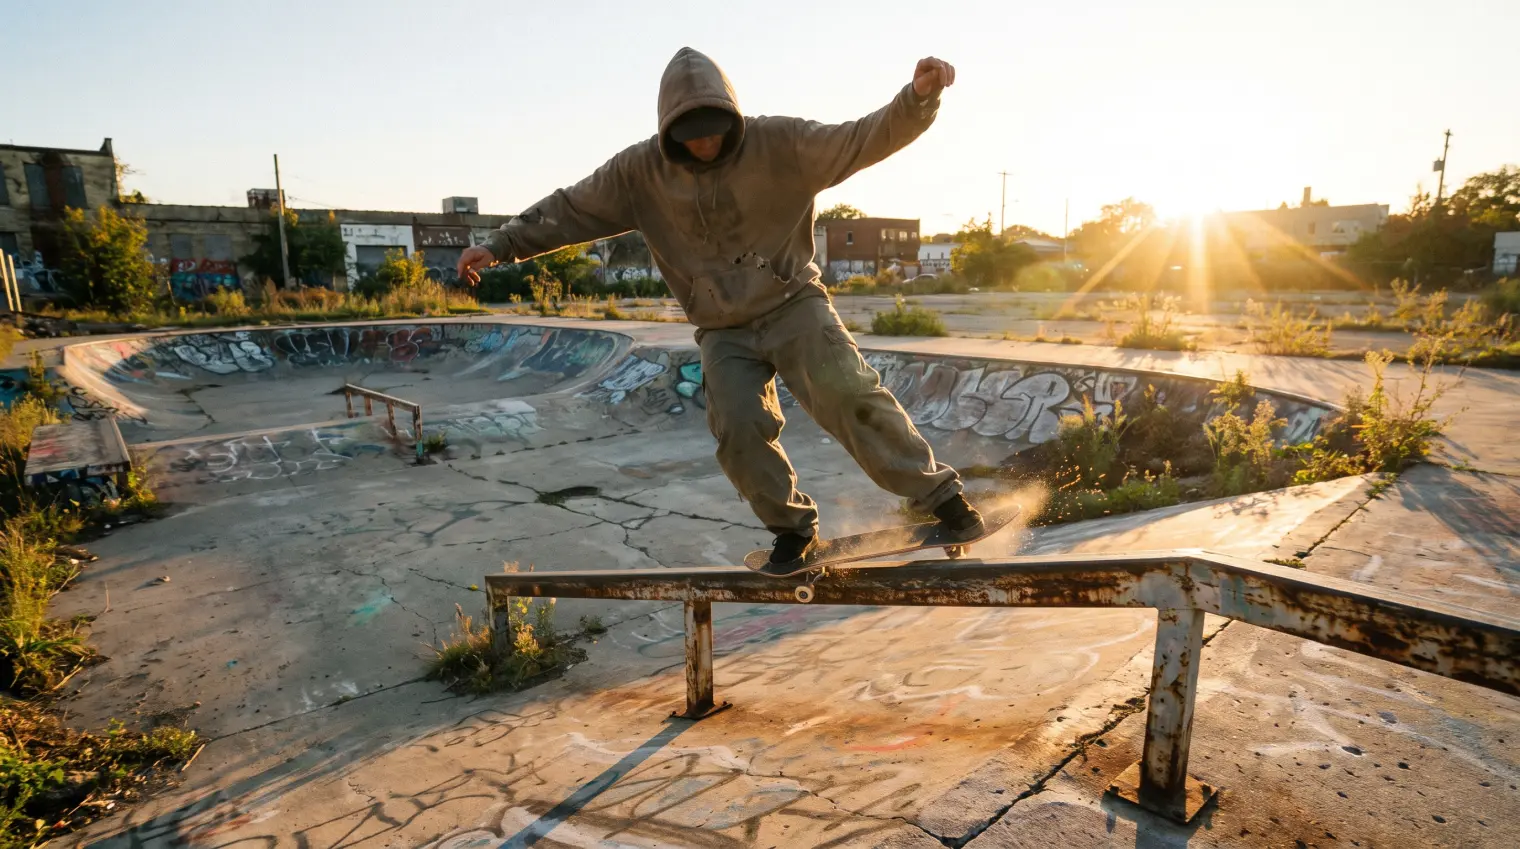
The boardslide takes 2 to 6 weeks according to Onbolts' learning data, and it only requires a solid ollie as a prerequisite, which makes it most riders' first real rail or ledge trick. If you've been sticking to flatground and you're wondering where to start with rails, ledges, and boxes, this is the entry point the skill tree is built around.
Why boardslide is the natural first rail trick
A lot of grind and slide tricks require specific setups, angles, or spin components that add difficulty on top of the basic act of getting onto an obstacle. The boardslide strips that down: you ollie onto the obstacle so your board lands perpendicular across it, slide on the middle of your deck, then ollie or hop back off. No grind trucks required (though they help long term), no rotation, no flip. It's the cleanest introduction to the mechanics of interacting with rails and ledges that the skill tree offers.
Its only prerequisite is the ollie, and that requirement matters more here than it might look. You need enough ollie control to consistently land your board at a specific angle onto a raised, often narrow surface, not just pop for height on flat ground.
The three parts of a clean boardslide
The approach and ollie. You need enough speed to comfortably clear onto the obstacle, and your ollie needs to be square, meaning the board lands perpendicular to the rail or ledge, not at an angle. This is the single most common point of failure for beginners, and it's worth drilling on flat ground first (see the drill below) before attempting an actual obstacle.
The slide. Once you're on, your weight should be centered over the middle of your board, not leaning forward or back. Bend your knees slightly and let the slide happen rather than fighting it. Tensing up here is what causes most falls, since a stiff, straight-legged stance has no give when the board catches or slows unevenly.
The exit. Pop back off the obstacle the same way you got on, generally with a small ollie or hop that clears you back to the ground with the board rolling straight. A common mistake is letting the slide just run out and stepping off awkwardly instead of popping a clean exit.
Practice the approach before you touch a rail
Because a crooked approach is the most common cause of falling off to one side, it's worth isolating that piece before adding a real obstacle into the mix:
- Ollie onto a painted line or a piece of tape on flat ground, aiming to land with your board perfectly perpendicular to the line every time.
- Ollie onto a low curb, which behaves similarly to a ledge but with much lower stakes if you land at a slight angle.
- Move to a wide box or ledge at a skatepark, which gives you more margin for error than a skinny handrail.
- Only then try an actual rail, once your ollie-onto-obstacle angle is consistent.
Skipping straight to a handrail is the most common reason boardslide attempts take longer than the 2 to 6 week average. A wide, forgiving obstacle removes one entire variable while you're still learning the slide and exit.
Speed control matters as much as angle
Beginners tend to focus entirely on hitting the obstacle square and underestimate how much speed affects the trick. Too slow, and you won't clear the ollie far enough onto the ledge or rail, leaving you balanced on the very edge with almost no margin. Too fast, and the slide covers more distance than expected, which can be intimidating and makes the exit harder to time. A moderate, consistent approach speed, the same speed each attempt, makes it much easier to isolate whether a fall was caused by angle, speed, or balance rather than guessing.
Wax matters more than people expect
A dry rail or ledge grips your grip tape and deck instead of letting them slide smoothly, which causes sudden stops mid-slide that throw riders forward unexpectedly. This is a mechanical problem, not a skill problem, and it trips up a lot of beginners who assume they're doing the trick wrong when really the obstacle just needs wax. Bring a skate wax stick, or use a candle if that's what's available at a spot.
Reading the obstacle before you commit
Not every rail or ledge is beginner-friendly. Height, width, surface material, and how sharp or rounded the edge is all affect difficulty. Round, waxed metal rails at a reasonable height are generally the most forgiving. Sharp-edged concrete ledges or anything above shoulder height should wait until boardslides feel automatic on easier setups.
Pay attention to what's underneath the obstacle too. A boardslide over a flat, smooth landing is a very different commitment than one over stairs or a steep bank, even if the rail or ledge itself looks identical. Choose spots where a bailed attempt has a soft landing while you're still building consistency, and save the more consequential setups for once the trick is second nature.
Protective gear is worth it for this phase
A lot of riders skip pads through flatground tricks and then get caught off guard by how differently a fall feels on a rail or ledge, especially a fall where the board slides out from under you mid-slide rather than a clean bail forward or back. Wrist guards in particular are cheap insurance during the boardslide-learning phase, since an instinctive hand-catch on a fall from a raised obstacle is a common way riders hurt themselves learning this specific trick. It's a small addition that lets you commit to more attempts with less hesitation.
Skatepark boxes versus street spots
Most riders learn their first boardslide at a skatepark, where boxes and ledges are purpose-built with predictable surfaces and forgiving landings on both sides. Street spots add real-world variables: uneven pavement, unpredictable surface material, and often a less forgiving runout. There's nothing wrong with learning at a skatepark first and taking the trick to street spots later, and in fact that's the more common and lower-risk path. If your only nearby option is a street spot, take extra time scouting it, checking the surface for grip, cracks, or debris, and confirming the landing area is clear before committing to real attempts.
Where this leads on the skill tree
Once your boardslide is consistent, the skill tree points toward the darkslide as a next step, a considerably harder variation where the board is flipped so the grip tape faces the obstacle instead of the trucks. That's a real jump in difficulty, and most riders spend meaningful time exploring other grind and slide variations before attempting it. The boardslide's real value isn't just the trick itself: it's the foundation of obstacle approach, balance, and exit timing that every other rail and ledge trick builds on.
Truck height and boardslide feel
Standard trucks put your board deck a certain distance from the rail or ledge surface, and that gap matters more for a boardslide than most riders expect. Higher trucks give you a bit more clearance, which can make the slide feel more forgiving if your approach angle isn't perfectly square yet. Lower trucks sit closer to the obstacle and can make the trick feel snappier once you're consistent, but they leave less room for error while you're still learning. This isn't a reason to buy new trucks specifically for boardslides, but if you're already due for a truck swap and finding the trick unusually difficult, it's worth knowing the setup itself is a small contributing factor, not just your technique.
Track it like any other trick
Use the same 5-level scale (learning, landed once, occasional, consistent, mastered) for the boardslide as you would for any flatground trick. Landing one clean slide on a good day is real progress, but obstacle tricks tend to be more spot-dependent than flatground ones, meaning a boardslide that's consistent on a familiar box might feel brand new on an unfamiliar rail. Log it on your progress page and expect some variance across spots even after you've got the mechanics down.
For a look at how the boardslide fits into the wider grind and slide branch of the tree, check the full tricks list, and browse the video library for approach-angle and exit breakdowns if the crooked-slide problem above sounds familiar.
Frequently asked
- How long does it take to learn a boardslide?
- Onbolts' learning data puts the boardslide at 2 to 6 weeks, assuming a solid ollie coming in. That's the only hard prerequisite listed on the skill tree, though most riders find comfort with basic 50-50 grinds or ledge balance helps too, even without being a formal requirement.
- Do I need to learn 50-50 grinds before boardslide?
- No, not according to the Onbolts skill tree. The boardslide's only listed prerequisite is the ollie. Some riders find grinds a comfortable stepping stone toward rail confidence, but there's no dependency between the two tricks, and plenty of skaters learn boardslide first.
- Why do I keep sliding off the side of the rail or ledge?
- This usually means your ollie onto the obstacle isn't square, meaning your board is landing at a slight angle instead of perpendicular to the rail. Even a small angle compounds as you slide, walking you off one side. Practice ollying straight onto flat ground painted lines before moving to an actual rail or ledge.
- Should I start on a low rail, a box, or a ledge?
- A low, wide box or ledge is generally the better starting obstacle over a skinny handrail, since it gives you more margin for a slightly off-angle approach and a shorter, less intimidating slide. Boxes and flat rails at skateparks are built specifically for this kind of practice.
- Why does my board stop suddenly (catch) mid-slide instead of sliding smoothly?
- This is almost always wax, or the lack of it. A dry rail or ledge grips the underside of your deck instead of letting it slide, which stops you abruptly and can throw you forward. Wax the obstacle (a skate wax stick or a candle in a pinch) before attempting slides on any new spot.
- What comes after the boardslide?
- On the Onbolts skill tree, the boardslide's next suggestion is the darkslide, a significantly harder variation performed with the board flipped so the grip tape faces the obstacle. Most riders spend real time exploring other slide and grind variations before attempting that jump.